Five-Piece Lining for Wood Frames
This technique is a simple and basic one in which the sides of the frame are lined with strips of matboard. Four strips of matboard are used, which can either be of the same color as the backing board containing the objects or a different color that coordinates with the other framing elements. The backing board itself is the fifth piece of the lining.
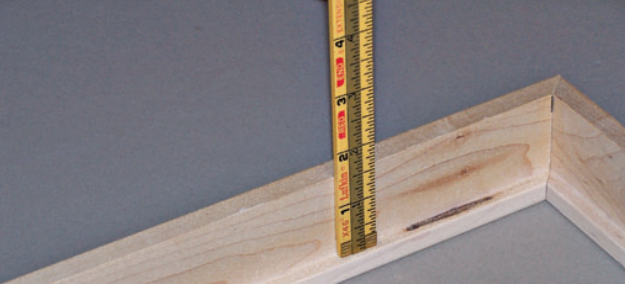
1. Lay the frame face down. Measure the depth of the frame—allowing for the thickness of the glazing, the backing board and the filler board. (One option is to place these materials in the frame and measure the remaining space.) Measure the width of one side of the frame interior.
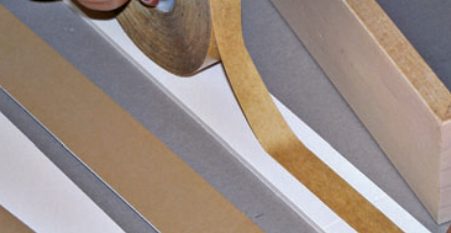
2. Cut two strips of matboard to this size. Cut two strips of foam board to match the size of the matboard strips. Attach each strip of matboard to a strip of foam board with glue or double-sided tape.
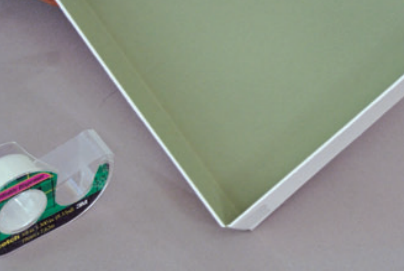
3. Place the glazing in the frame. Apply glue plus a couple of short pieces of double-sided tape—to help the strips stay in place while the glue dries—to the two strips. Attach the strips to opposite sides of the frame, resting the bottom edges on the glazing.
4. To ensure that the ends of the frame match well, it is important to measure the remaining sides precisely. After taking the measurements, cut strips of matboard and foam center board to the same length and depth as the other sides. Once you have the strips ready, attach them to the frame securely.
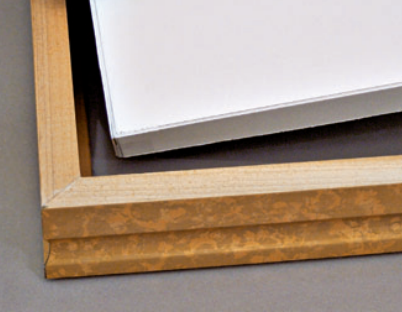
5. The exposed edges of the installed strips create a ledge to hold the backing board. Place the backing board (with objects attached) face down in the frame. Add a filler board. Complete fitting as directed in our blog “Fitting and Finishing the Frame (Basic Fitting Procedure for Wood Frames, steps 5–9)”.
Quick Box for Wood Frames
This is a one-piece component, cut from a matboard. The measurements need to be precise, as the unit must fit almost perfectly into the frame. You have the option of attaching the objects to the quick box’s base either before or after folding and taping the box’s sides in step 5.
1. Lay the frame face down. Measure the depth—it must be deep enough to hold the thickest object, the glazing, and a filler board, plus a little air space between the objects and the glazing. Measure the interior length and width. Add the depth of the thickest object (plus ¼” [6 mm] for air space) to all four sides. In this example, the interior of the frame measures 11″ × 14″ (27.9 × 35.6 cm), and the thickest object is 1″ (2,5 cm), so the board will be cut 13½” × 16½” (34.3 × 41.9 cm).
2. Measure and mark the frame size on the back of the matboard. In this example, mark a 1¼” (3.2 cm) border on all four sides of the board.
3. Score the board on all four marked lines. A score is a cut that slices into the board but does not cut all the way through it. Practice learning how much pressure is needed to make a score. If the board is accidentally sliced all the way through, the cut can be taped together, but the board is weakened.
4. Cut out and remove the squares of matboard at all four corners. (Objects can be attached at this point if desired.)
5. Fold the sides of the box upward along the score lines. Tape the corners securely on the outside of each corner.
6. After all four corners are taped, attach the objects (if not already done in step 4.)
7. Lay the frame face down on the worktable. Place the glazing in the frame. Insert the Quick Box. Complete fitting as directed in our blog “Fitting and Finishing the Frame (Basic Fitting Procedure for Wood Frames, steps 5–9)”.
Note: A quick box can be made from foam center board for more strength, but the board must be covered with fabric before cutting or with matboard after cutting unless the surface color of the foam center board is acceptable in the frame design. Measuring can be tricky, because the thickness of the foam center board must be accommodated when adding the depth of the objects to the size of the frame.
Lining Metal Frames for Shadow Boxes
The two lining methods described above can be used with metal frames, but the materials must be sized to fit into the channel of the metal frame. A metal frame made to hold art on canvas can be used as a shadow box frame for objects up to about ¾” (1.9 cm) thick. Be sure to allow room for the glazing and backing board when measuring. If using the five-piece lining, attach the strips of foam board/matboard to the sides of the frame using double-sided tape. After the board containing the objects has been inserted in the metal frame, complete the fitting as described in Basic Fitting Procedure for Metal Frames(steps 4-8) of our previous blog, as mentioned above.
Note: Typical canvas-depth metal frames should only be used for framing lightweight objects, because too much weight exerts pressure on the lower corners of the frame, forcing them to separate. For heavier objects, look for the type of metal frame that has two channels for hardware, one in the front of the frame and one in the back.