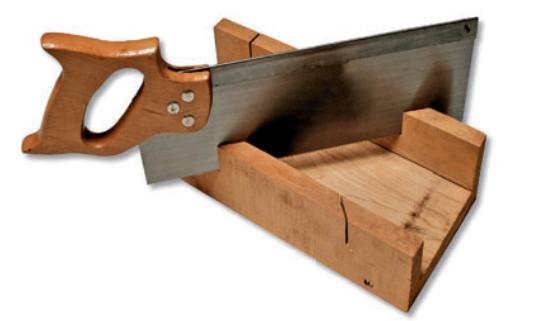
For DIY framing, and for many professionals as well, picture frame moulding is cut with a saw. A clean, accurate 45-degree miter cut is essential. A limited range of mouldings can be cut with a hand saw and miter box, and this is all some DIY framers ever need. A manual miter saw designed specifically for cutting moulding is a more practical and efficient option for framers who will cut moulding frequently.
Professional framers use an electric miter saw, which can cut almost any wood picture frame moulding. For the DIY framer who already owns such a saw or wants to invest in this level of equipment, note that there are different types of blades (carbide or steel, varying number of teeth, and so on), each with its own advantages. Read the information from a couple of different manufacturers to determine the best blade for your use. Our experts prefer a blade with many small teeth, not a rip saw. Many framers prefer a 10″ or 12″ (25.5 or 30.5 cm), 80-tooth, carbide blade with alternately beveled teeth, which will cut all but the widest and deepest of mouldings. A saw fence with a 45-degree angled scale is crucial for consistent, accurate cutting.
Note: When cutting moulding, always use safety precautions such as wearing eye masks to protect against wood chips and using hand guards on saws to protect fingers. Additionally, it’s important to control the sawdust to prevent inhalation.
Importance of Sanding
There are several reasons why a miter cut may not be smooth, such as a dull saw blade or damp wood. Rough cuts should be sanded before attempting to assemble the frame. There are sanding tools sold specifically for this purpose, but unless you need it for a large number of frames, an ordinary sanding block is suitable. The best type of sandpaper depends on the type of wood and roughness of the cut. Sanding can also be used to make mitered corners align correctly. After cutting four pieces of moulding for a frame, lay the pieces in their proper position on a flat table and examine the alignment of the miters at each corner. Sand the miter cuts if needed to create well-matched corners, but go slow—make small adjustments and test again.
Methods for Joining Wood Frame Mouldings
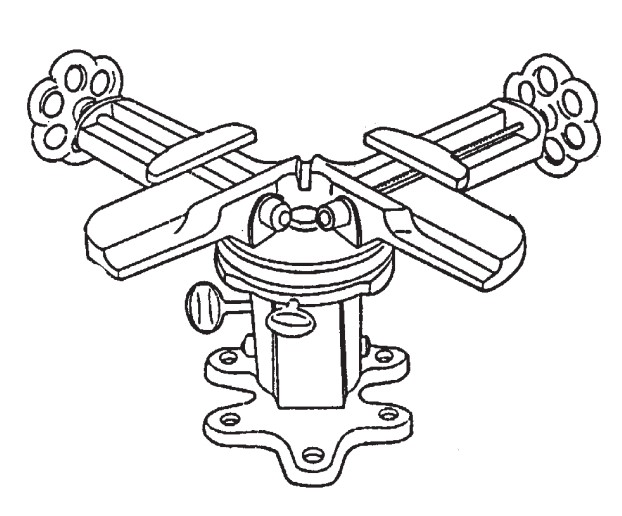
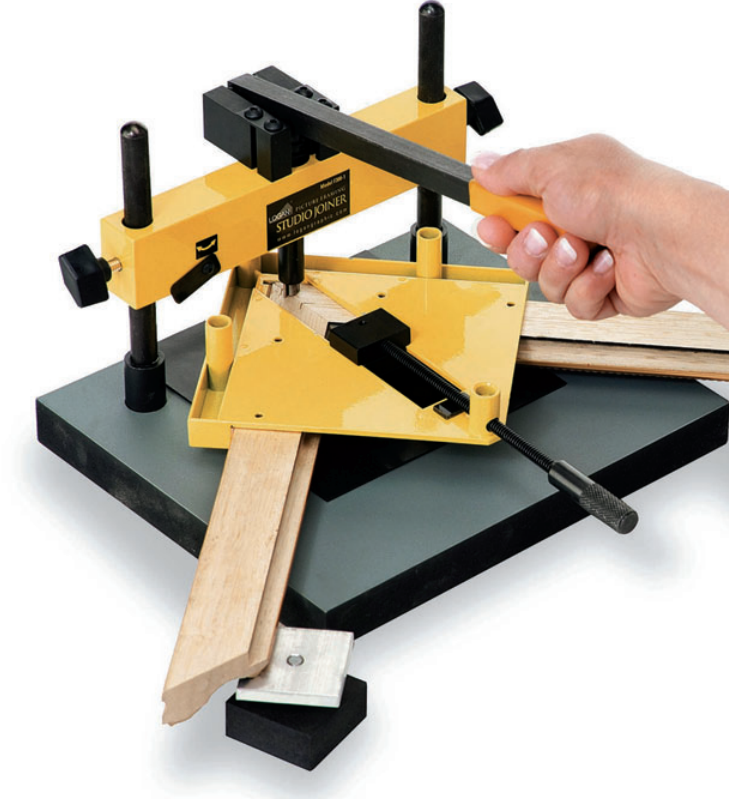
There are several ways for the DIY framer to join wood frames. Regardless of the method chosen for joining miter-cut wood frame moulding, the corners should first be glued together, using a glue made for wood. This can be done corner-by-corner using a corner vise, or all four corners at once using a strap clamp. There are some super-hold glues that claim they will never break down, but glue alone is not sufficient (no matter what kind) except on very small frames. Wood changes as it ages, drying and shrinking; any glue will eventually fail. For more details, consult our blog “Frame Joining Techniques”.

Corner Vise – Hammer and Nails
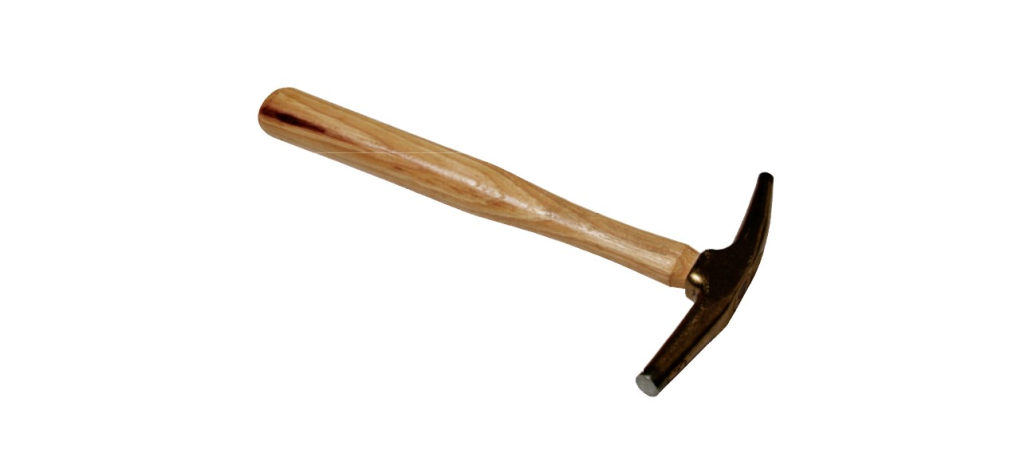
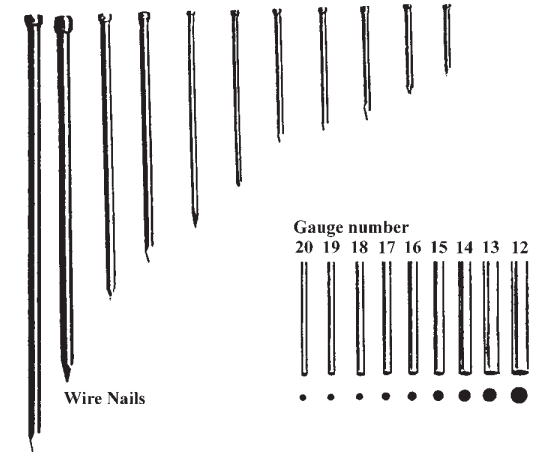
The most basic joining method uses a corner vise or corner clamps and a hammer and nails. This is a strong and reliable way to join frames. The appropriate nails are straight, small-headed wire nails, also called brads, which are available in a variety of sizes. Choose the size according to the hardness of the wood and the size of the frame. A tack hammer is a good tool for inserting the brads. It may be necessary to first drill in very hard wood such as oak or ash. To avoid marking the moulding as the hammer reaches the frame surface, push the brad through a small square of matboard before beginning to insert the brad. When the matboard rests against the frame, pull it off of the brad. Use a nail set to finish sinking the brad, and sink it about ⅛” (3 mm) beneath the surface of the frame.
Use of Color-Coordinated Filler
The “hammer and nails” joining method creates visible nail holes that must be filled for a professional finish. Use a color-coordinated filler made for wood. Non-drying nail filler in many colors, made especially for filling nail holes in frames, are available at Custom Framing Wholesale.
No Nail Method
Another traditional joining method employs wood disks called biscuits that fit into slots routed in the corners of the frame. Some woodworkers consider this “no nail” method superior to all others, and it is a very nice way to join frames at home for those experienced with this technique, but it is rarely used by professional framers.
V-Nailer Machine
Professional framers like to join frames with a V-nailer, a machine that inserts V-shaped hardware into the underside of the moulding, so there are no nail holes in the frame finish. Two rails of moulding are placed in the machine with the miters aligned, a lever is pressed, and the hardware is released. Small versions of the V-nailer, capable of joining many types of wood moulding, are available for the DIY framer.