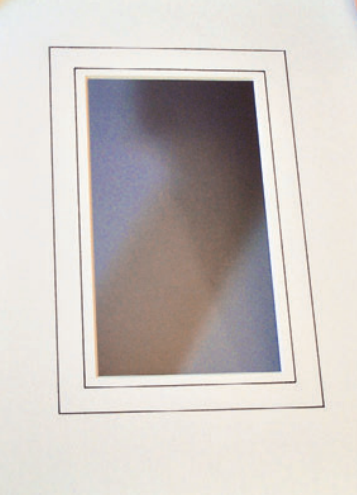
This traditional mat decoration method uses ink lines and pale washes of watercolor to surround the opening of the mat. French matting usually seems dignified or elegant depending on the colors and configuration of lines and washes. Traditionally used to frame engravings, handcolored prints, and watercolor paintings, French matting has become a popular decoration for art prints, photo portraits, and important documents as well. The matboard color is usually white, cream, or a very light pastel.
Purists use an old-fashioned ruling pen and permanent ink to draw the lines, but any fine-tip, permanent felt-tip marker that does not bleed into the mat will be fine (try fine-tip pigmented pens). Good quality colored pencils may also be used. Use a cork-backed ruler to guide the pen or pencil.
The wash panel can be made with any student-grade tube of liquid watercolor or the bottled acrylic paints sold in the craft stores in dozens of colors. If you are using a traditional ruling pen to draw lines on the mat, the craft acrylic paint can be used full strength in place of ink. The wash of color in the panel is supposed to be very pale and transparent, so it is mostly water with just a dab of paint. The brush should be a ½” (1.3 cm)-wide flat soft brush. We recommend the acrylic-bristle brush or you can contact Custom Framing Wholesale for choosing appropriate colors and brushes, along with other professional guidance.
Basic Steps for Drawing the Lines with a Fine Marker
1. With a pencil and ruler, make dots (actually small circles, so as not to make dents in the mat) near the corners of the mat, ¼” (6 mm) from the mat opening. Draw lines at the intersections of the four corners to indicate where to start and stop each ink line. Make a second set of pencil dots and lines ¾” (1.9 cm) away from the mat opening.
2. Line up the ruler along one of the inner sets of dots. Draw a line with the marker from one corner dot to another, being careful not to let the marker linger at any point or overlap in the corners.
3. Turn the mat, and line up the ruler with a second set of inner dots. Draw a line. Continue around the mat.
4. Draw the second set of lines using the outer set of dots. Erase all pencil marks.
How to Make a Watercolor Wash Panel?
1. Mix a pale wash of color. Test on a scrap of the same color of matboard to test the color.
2. With clean water, use the brush to apply a light wash to the panel between the ink lines. This helps the color to absorb evenly.
3. Dip the brush into the watercolor wash. It should be wet but not dripping. Starting 1″ (2.5 cm) away from any corner, rest the tip of the brush lightly on the matboard, and begin to pull the brush along the panel. Add more wash color to the brush as needed, and begin slightly before the end of the last brushstroke each time the brush is set onto the mat.
4. Near the area where the end of the wash panel will connect with the dry paint at the beginning, lift the brush and dab it on a paper towel to remove excess wash. Use the brush to blend the start and finish of the wash.
Embellished Mats
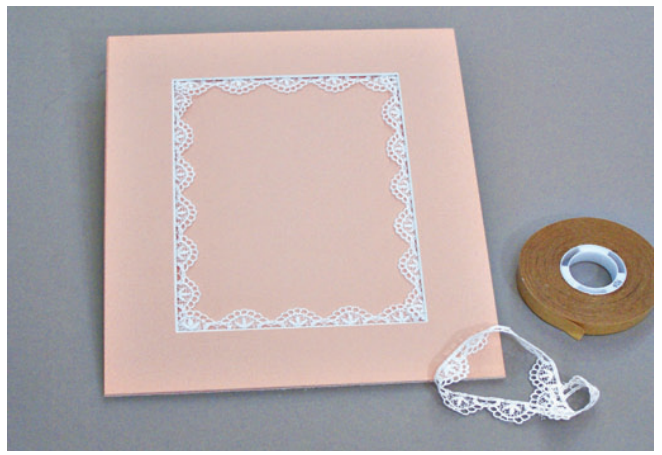
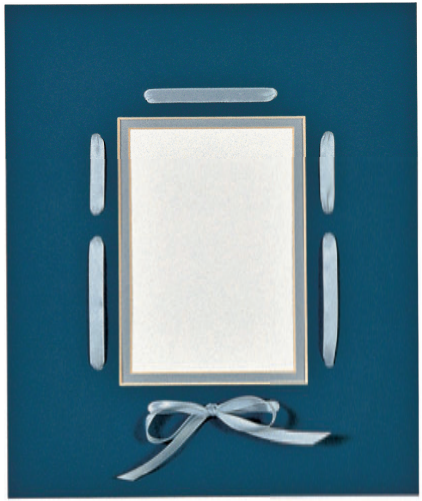
As the surface of a matboard is essentially a sheet of paper, many stickers, rubber stamps, and other embellishments for scrapbooking and card-making are suitable for decorating mats. Better yet, many of the products are already coated with adhesive for easy application; if not, use tiny dots of white glue or double-sided adhesive. The look can be elegant (a monogram in one corner of the mat), playful (cartoon characters sprinkled all over the mat), romantic (vining flowers surrounding the mat opening) or many other styles.
Dimensional embellishments are also an option: beads, seashells, and other small items can be glued to a mat. If the frame will have glazing in it, there will need to be space in the frame for the embellishment, as when making a shadow box. However, it must be noted that some embellishments may be attached to fabric-covered mats with fabric glue, but test first to make sure the glue holds.
Colored Bevels
A colored bevel is a simple but effective mat decoration. Bevels can be colored with acrylic craft paint or colored pencils. Cut the mat first, and then surround the opening with removable pressure-sensitive tape to protect the surface of the mat. Felt–tip markers can be used, but test them on a scrap board to make sure the ink does not bleed onto the surface of the mat.
Window Accents for Mats
We have seen how a double mat creates an attractive accent line within a mat window. Other materials can also be used to make a decorative inner border.
Sometimes a narrow wood or plastic moulding called ‘fillet moulding’ is used to create this accent line. Fillet moulding is made specifically for this purpose, with a narrow rabbet that attaches to the back of the mat, and a decorative lip that is exposed. It is cut with a beveled corner just like regular moulding. The decorative lip may be a simple scoop or half-round design, or it may have a line of small beads or an embossed pattern. Common colors are gold, silver, stained wood tones, or black. The mat for a fillet is usually cut with a reverse bevel. Glue or double-sided tape may be used to attach the fillet to the back of the mat.
Begin by attaching one piece of fillet securely in the mat opening. Then attach an adjacent piece, matching the corners. Continue around the mat opening. Paper strips, cut about 1″ (2.5 cm) wide and folded in half, allow framers to use everything from wrapping paper to wallpaper to make an accent liner. As long as the material is thin and will lay flat in the frame, it has potential. This is a decorative framing technique, but it can be used with valuable artwork if it can be determined that the liner material has the qualities necessary for conservation framing. Use Magic Mending Tape to attach the liner material to the back of the matboard.