Careful, accurate measuring is one of the most important parts of successful picture framing. When it comes to measuring art and determining mat and frame sizes, working with fractions is an important part of the process. Lots of people, including picture framers, find working with fractions a bit aggravating, but with a little practice it becomes routine.
Use a good-quality ruler, carpenter’s rule, or metal measuring tape for measuring. Use only pencil to record measurements to avoid permanent marks on artwork and mats. Also be careful not to make dents or scratches on the surface of the art with the measuring tool. Even bright color nail polish can make a mark on the artwork, if the edge of a fingernail swipes along the art.
Measuring Art that Will Not Be Matted
Needlework, art on canvas, some art prints, and photographs may be framed without matting. If glazing will be used, remember that space between the art and the glazing is important.
Lay the art flat. Use weights, if necessary, when measuring artwork that has been rolled in a tube. Measure the art image in both directions. For art on paper, this may be the entire sheet of paper, or just a portion of it. Measure at the approximate center, both horizontally and vertically. Most paper reproductions will be square, but you can never be sure. Remember the lip of the frame will cover the edges of the art on all four sides.
For needlework, blocking or pressing may be necessary before measuring. Determine the exact image size, remembering that the lip of the frame will cover ¼” (6 mm) on all four sides.
For a stretched canvas, the size of the bars and the thickness of the canvas wrapped around the bars may add fractions of an inch to a standard size. Check to see if the canvas is square—an out-of-square canvas may measure smaller at one corner than another.
Measuring Art that Will Be Matted
Most art on paper (such as prints, drawings, photographs, and watercolor paintings) and many needlework pieces will be matted. The mat must overlap the art a minimum of ⅛” (3 mm) on each side, and a bit more is even better— otherwise the art can peek through or even fall through the mat opening if the frame is knocked or during changes in heat and humidity. If the image has extra blank paper around it, it is still important to cover a bit of the image with the mat, or any error in mat cutting will result in unwanted blank paper showing within the mat opening. Either measure the art exactly and subtract ¼” (6 mm), or simply measure slightly short of the edges of the image. Of course, more of the art can be covered if desired to hide dirt, holes, or other unwanted portions of the image. If you need technical assistance in your framing project, contact Custom Framing Wholesale. Our experts will examine your art and will guide you properly in successful completion of your project.
Alternative Mat Openings
The mat does not always cover the edges of the art. Here are some examples.
Print Paper as a Border
Many art prints have at least a couple of inches (centimeters) of extra paper surrounding the printed image; it is typically white. This can serve as a border if desired. Measure the art image exactly, and then add the amount of paper that will show in the mat opening, usually between ¼” (6 mm) and ¾” (1.9 cm) on all four sides.
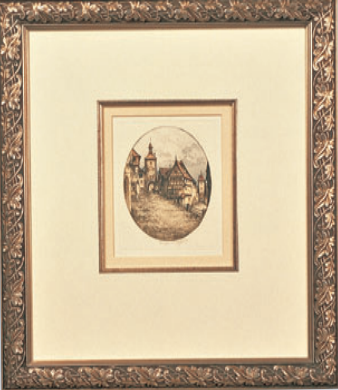
Engravings and Other Art with a Plate Mark
A plate mark is a raised or indented rectangle on the art paper where a printing plate made an impression, or where an artificial plate mark was created. It is customary to show the plate mark in the mat opening.
Limited Edition Prints
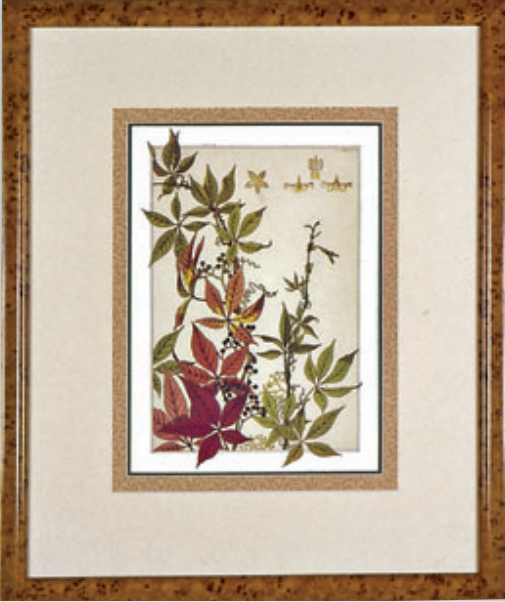
It is common practice to show the signature on a limited edition print, and the signature is most often on the blank paper just below the image, in the right corner. If the print is numbered, the numbering is commonly at the left with the title in the center. When measuring the art, include enough of the blank paper at the bottom to include the entire signature. For balance, some blank paper should be shown on the other three sides as well: either the same amount as was shown at the bottom, or a smaller amount, such as ¼” (6 mm) or ½” (1.3 cm). This choice is a matter of personal preference.

Floated Art
Floated art is suspended on the backing board with all of the edges of the art showing. The backing board becomes part of the framing design, acting as the first border of color around the art. A window mat is usually added. The opening for the window mat may be just ¼” (6 mm) away from the edges of the art, or it may be 1″ (2.5 cm) or more if preferred. Carefully measure the art, and then add the amount of backing board that should show to determine the mat opening.
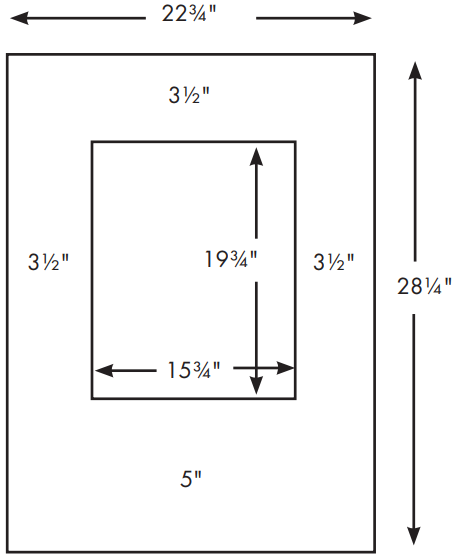
Mat Mathematics
To determine the outside size of a mat, the mat borders are added to the mat opening. Remember that the total of two borders must be added to each dimension. Both the top and bottom borders must be added to the vertical measurement of the mat opening and both the left and right borders must be added to the horizontal measurement of the mat opening. This may sound obvious, but forgetting this is one of the most common mistakes made by inexperienced framers. Custom Framing Wholesale suggests the following steps;
1. Measure the artwork and determine the opening for the mat.
2. Add the amount of both side borders (left side and right side) to the horizontal opening measurement.
3. Add the amount of both the top and bottom borders to the vertical opening measurement.
4. The total will be the outside size of the mat, and the size of the backing board, filler board, and glazing. The frame will be just a bit larger, so the materials can fit comfortably in it.
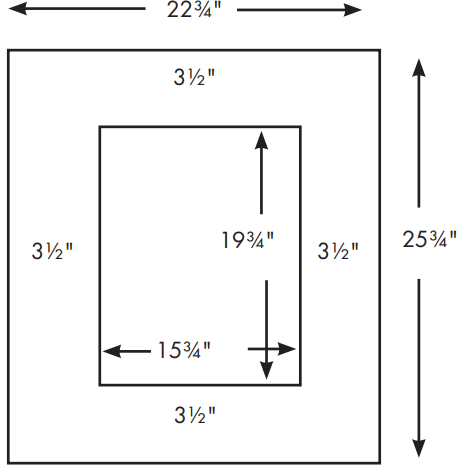
Let’s look at a couple of examples: The artwork is vertical and measures 16″ × 20″, so the mat opening will be 15¾” × 19¾”.
Determining the Size of a Double Mat
A double mat is two mats stacked together, with a small amount of the bottom mat exposed within the window of the top mat. This is done by cutting two different size openings: one for the liner mat, another for the top mat. The exposed part of the bottom mat is called a lip, liner, or reveal. The reveal is typically ¼” (6 mm) wide, but it may be ⅛” (3 mm) or some other amount.
When cutting a double mat, the bottom mat border is the full size of the mat border the designer has chosen. If the designer selects a 3″ (7.6 cm) mat border, the liner mat will be 3″ on all four sides. The top mat must be cut with a larger opening, to reveal some portion of the liner mat. A larger mat opening means a smaller amount of mat border for the top mat. The amount of decrease in the size of the top mat border is determined by the size of the reveal. If the bottom mat reveal will be ¼” (6 mm) on all four sides, subtract ¼” (6 mm) from the full border size.