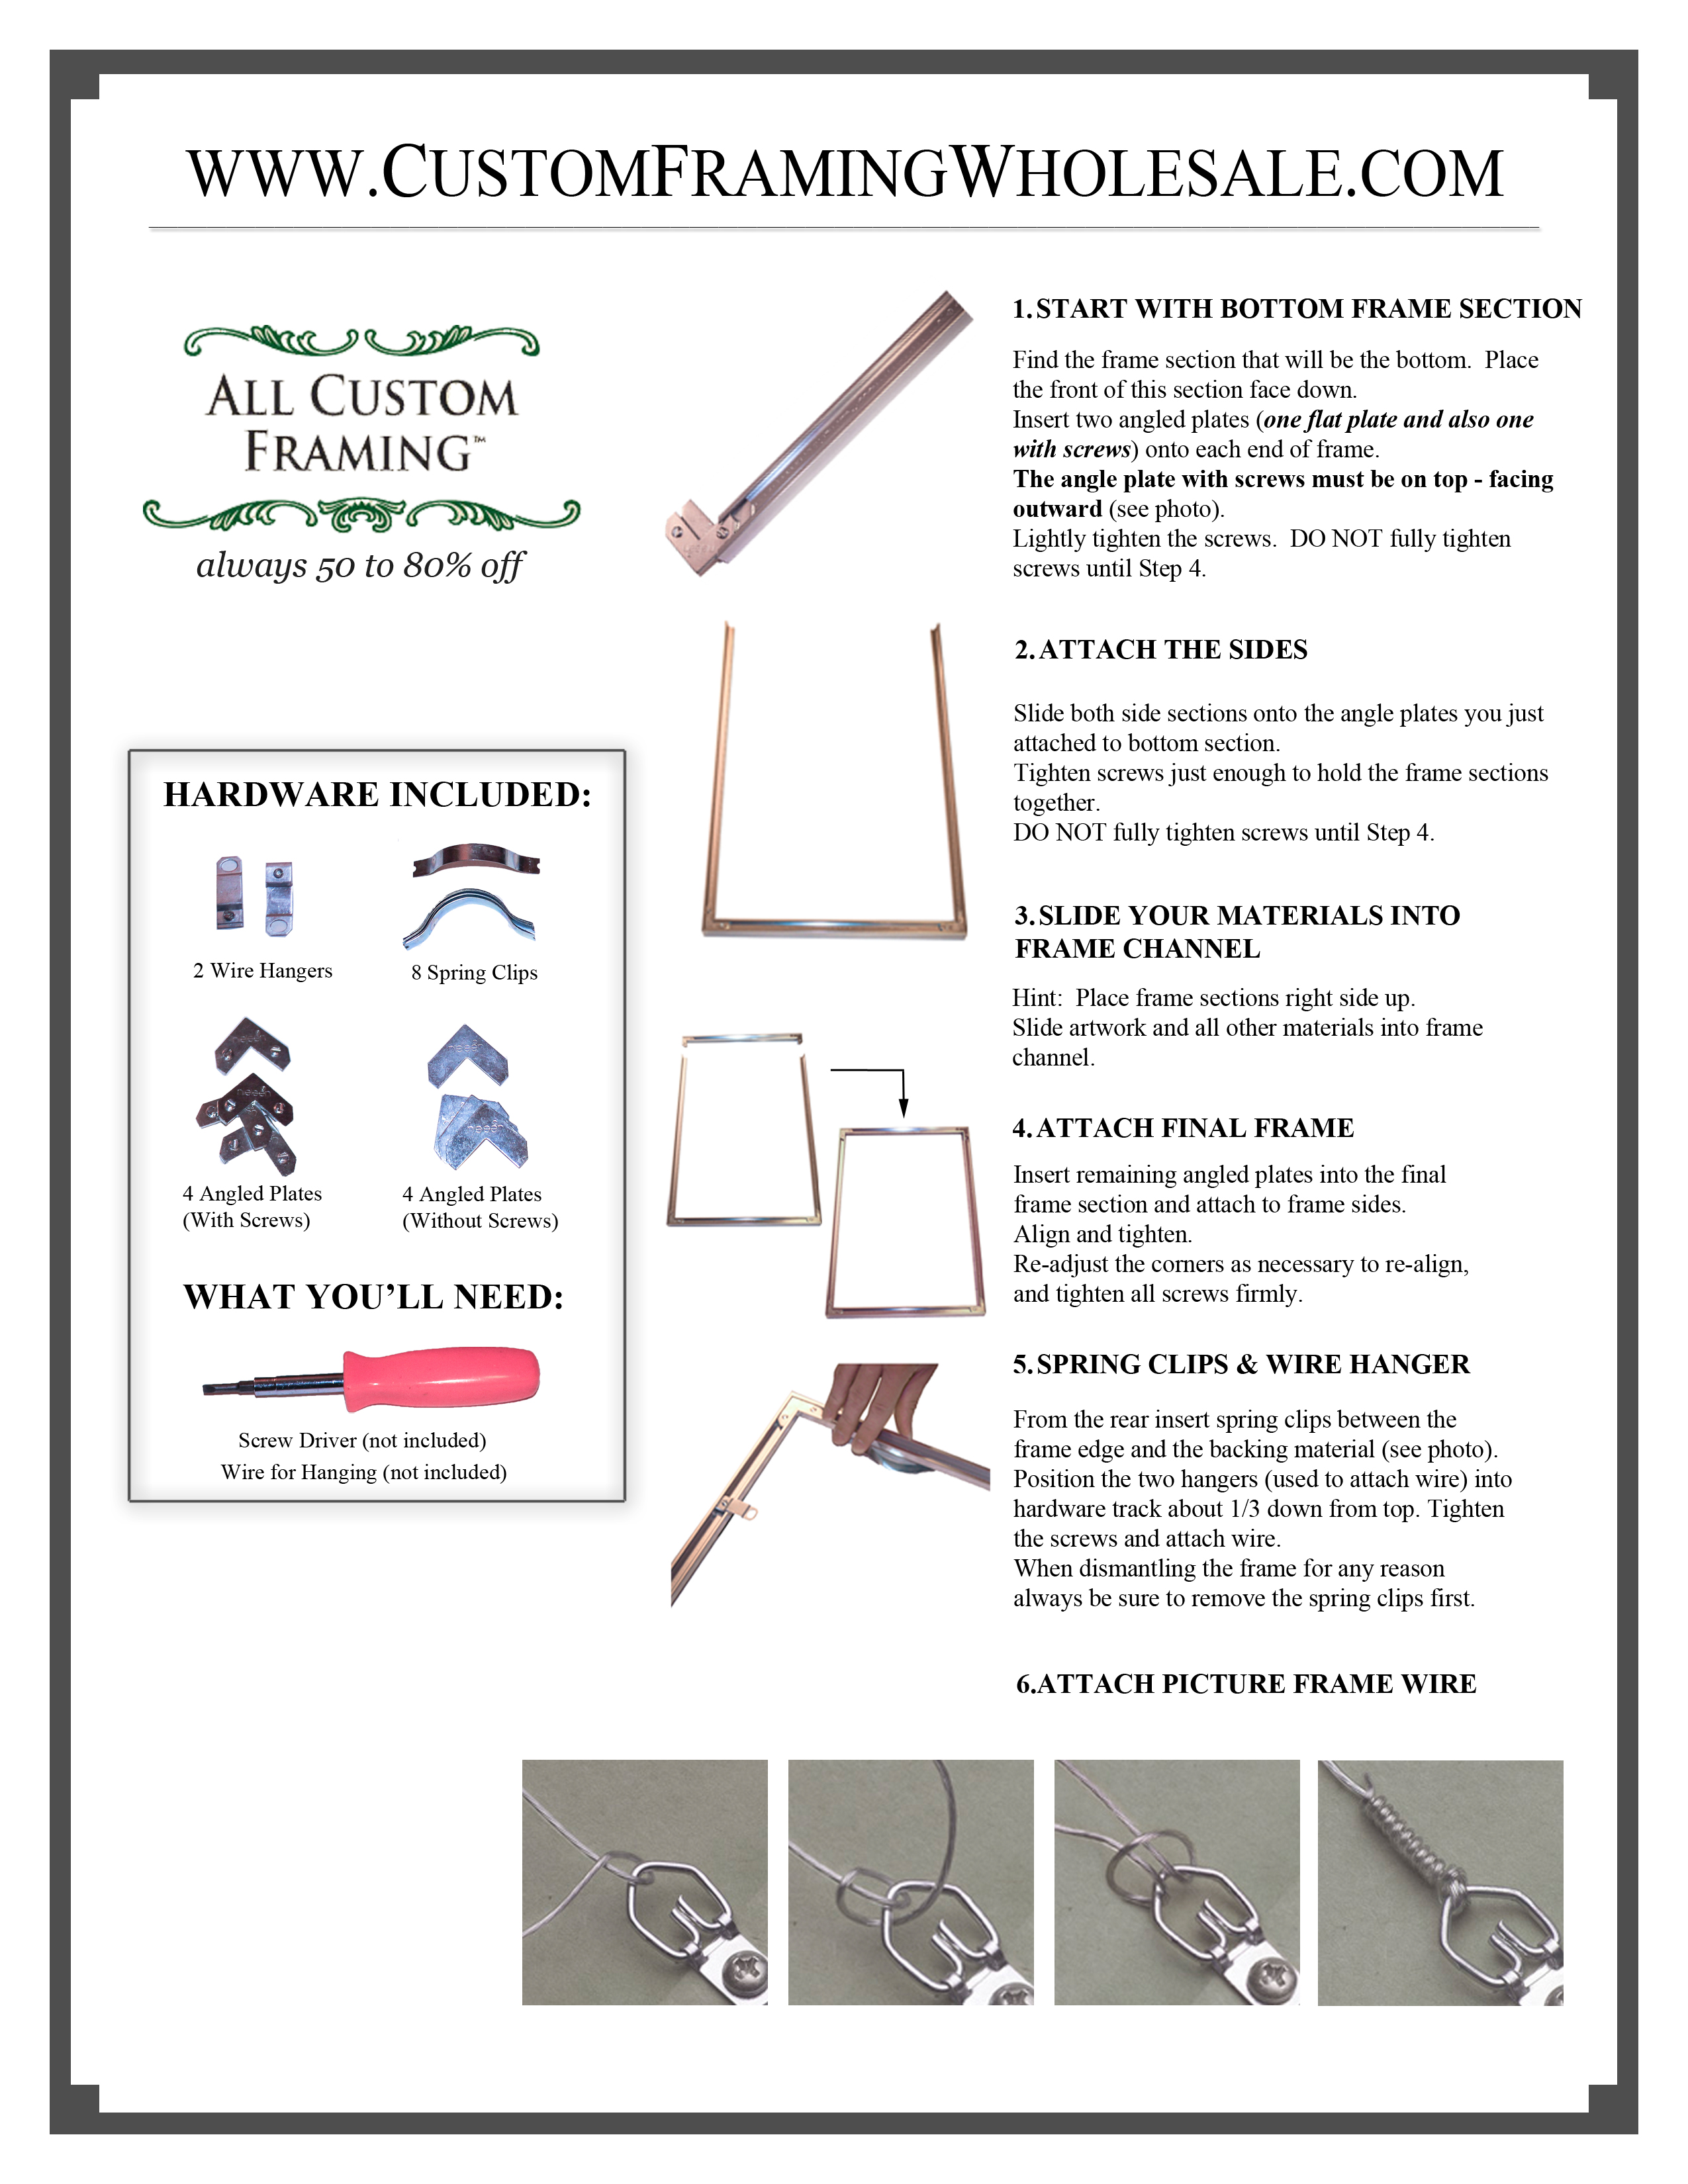
Find the frame section that will be the bottom. Place the front of this section face down. Insert two angled plates (one flat plate and also one with screws) onto each end of frame. The angle plate with screws must be on top. Lightly tighten the screws. DO NOT fully tighten screws until Step 4.
2. ATTACH THE SIDE
Slide both side sections onto the angle plates you just attached to bottom section. Tighten screws just enough to hold the frame sections together. DO NOT fully tighten screws until Step 4.
3. SLIDE YOUR MATERIALS INTO FRAME CHANNEL
Hint: Place frame sections right side up. Slide artwork and all other materials into frame channel.
4. ATTACH FINAL FRAME
Insert remaining angled plates into the final frame section and attach to frame sides. Align and tighten. Re-adjust the corners as necessary to re-align, and tighten all screws firmly.
5. SPRING CLIPS & WIRE HANGER
From the rear insert spring clips between the
frame edge and the backing material. Position the two hangers (used to attach wire) into hardware track about 1/3 down from top. Tighten the screws and attach wire.
Warning: When dismantling the frame for any reason always be sure to remove the spring clips first.


